Yesterday is was announced that NAV2016 will have support for Azure SQL. This is a short introduction to Azure SQL for Microsoft Dynamics NAV users and developers.
Azure SQL is “SQL as a Service”, access to a SQL database without having to host or run a Microsoft SQL Server installation. Currently with NAV2015 you have to host a MSSQL Server on a virtual machine to have a NAV database in cloud.
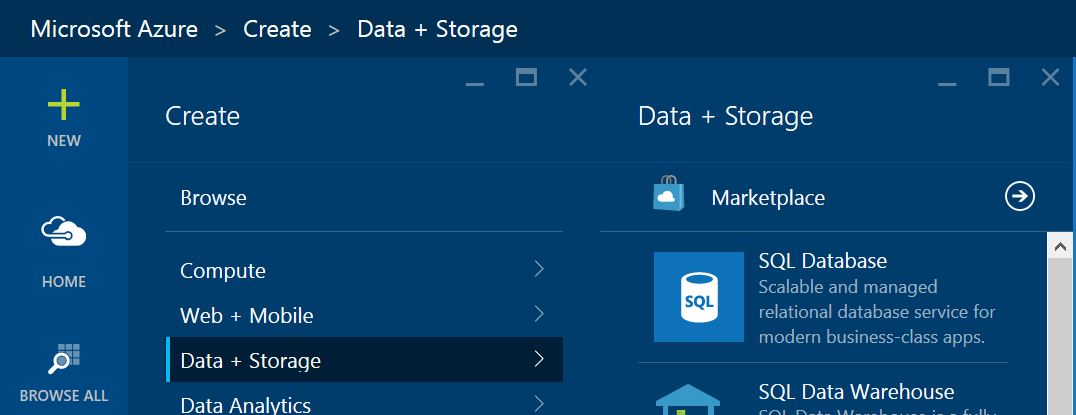
So, to get started, you need to access your Azure administration, either through the old manage.windowsazure.com or the new portal.azure.com (Used here)
Click new, select Data+Storage and select SQL Database:
Unless you have already created a “server”, you need to do that. The server defines in what datacenter your database will be located, and defines the credentials needed for access.
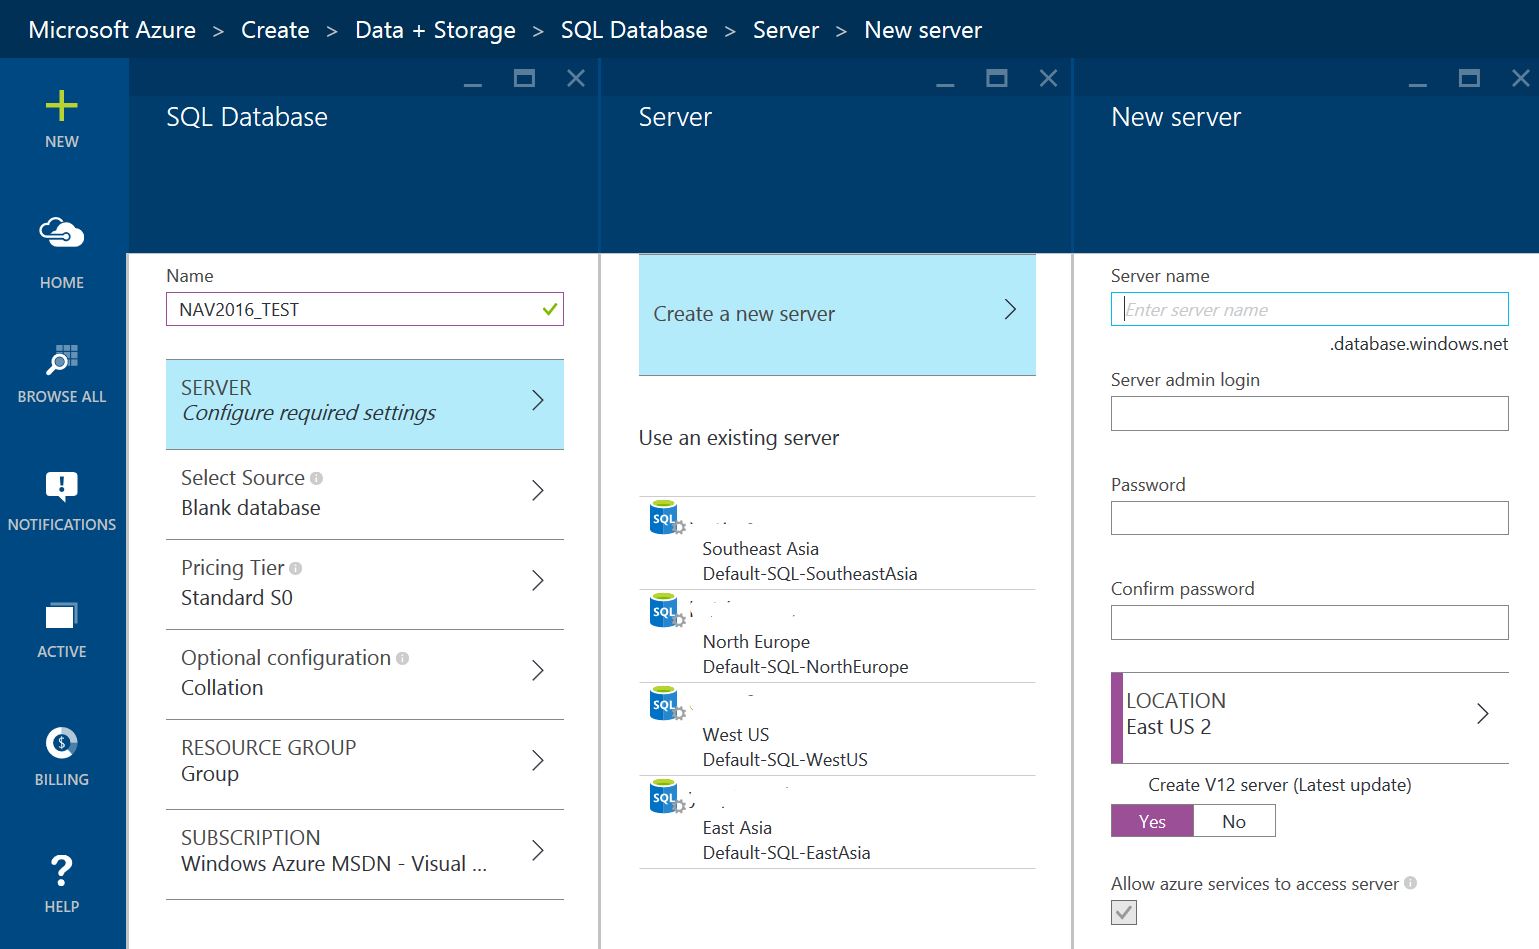
After you got a server, you must create the database. You have the following configurations options:
Select Source – Azure SQL has the this really cool extension SQL method “CREATE DATABASE <name> AS COPY OF <other name>. So it is really easy to duplicate databases within same “server”. If you don’t have other databases yes, just keep “Blank database”.
Pricing Tier – Select how powerful this database should be. Standard S0 is rated a 512 transactions pr. minute. A P3 server is 735 transactions pr. second.
You can see prices here: http://azure.microsoft.com/en-us/pricing/details/sql-database/
And you can read more about SQL sizing here: https://msdn.microsoft.com/library/azure/dn741327.aspx
The price tier also selects for how long Azure keeps backups.
Collation – This is the same at “normal” SQL – So select the collation you need.
Resource Group – Not very important at first. If you got lots of different Azure services, you can group them in resource groups.
Subscription – Who is picking up the bill for this. If you got more than one Azure subscriptions, select the right now.
Click create, and you got a database (and a server).

All Azure SQL servers are firewalled as default, so you must click on the server, and select Show firewall settings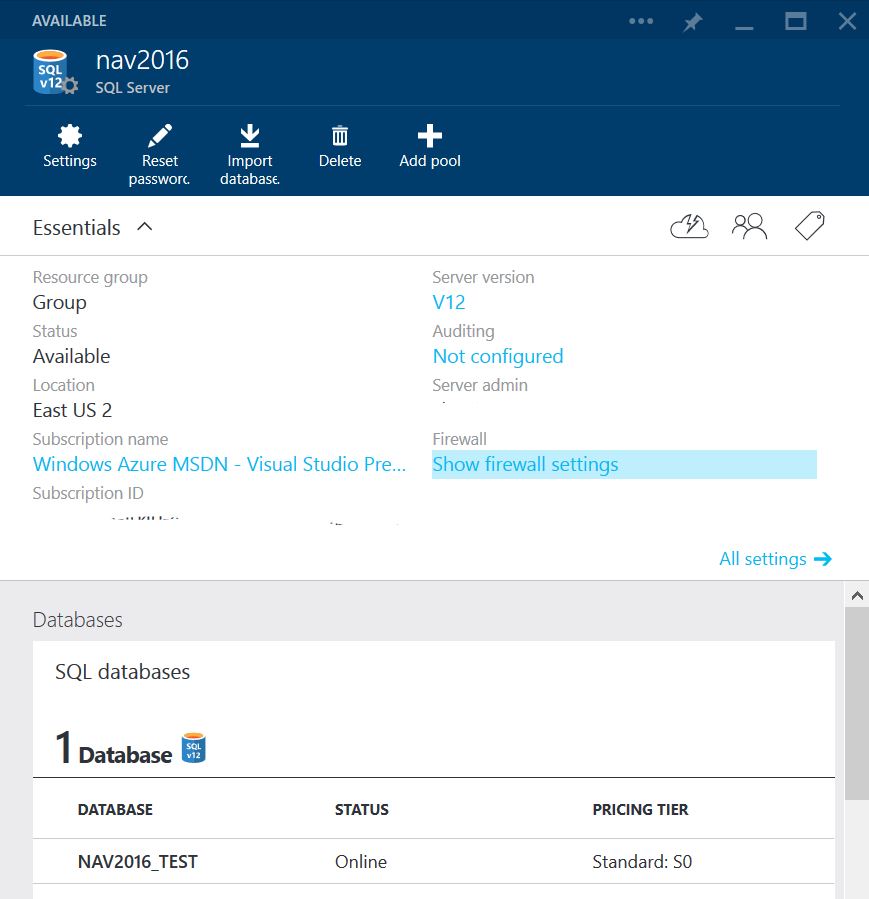
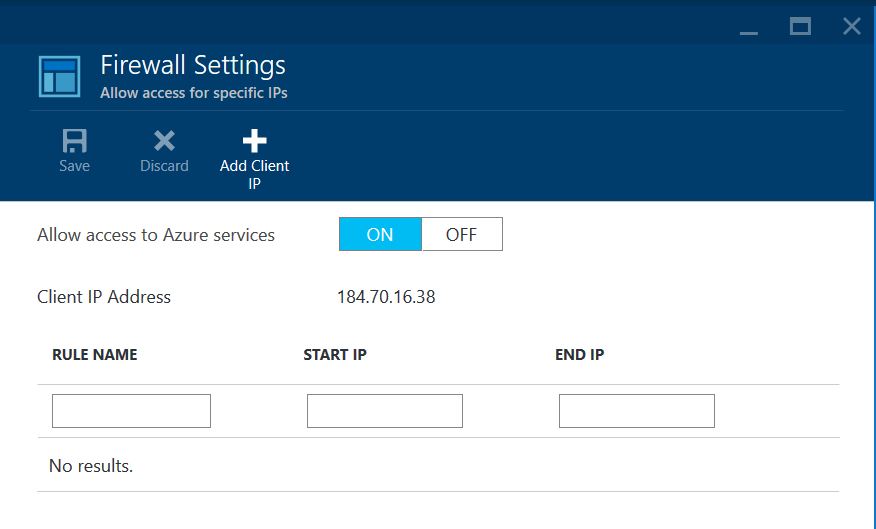
In firewall settings you must add the IP address of server and networks that will have access to the Azure SQL server. When you create the server, you can select “Allow access to Azure services” to allow access from other Azure services.
And right now, this is a far as we can come, with the current information released from Microsoft.
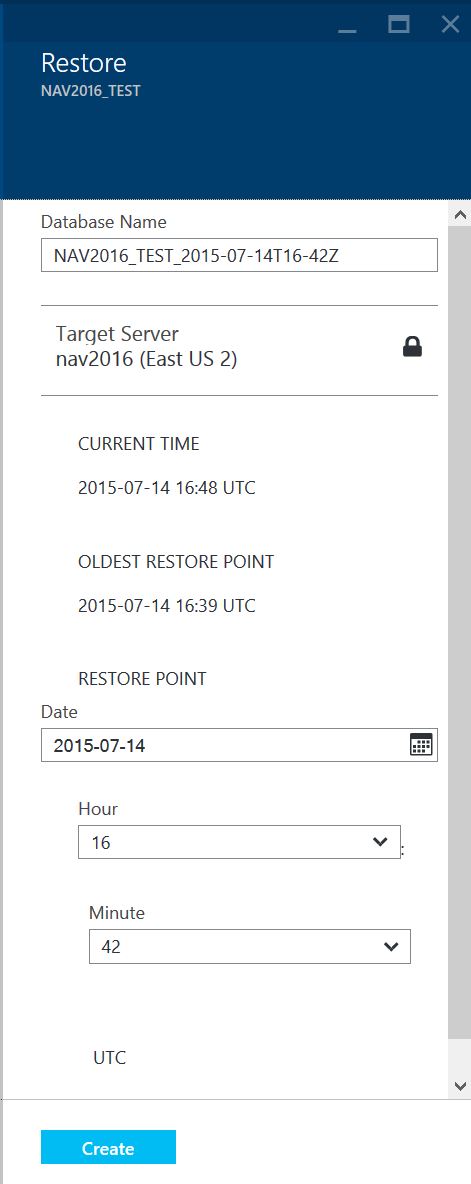
This next question that comes is, how do we get data from a local SQL database to our new Azure SQL database. Clicking on “Restore” in the top does snot help. That is access to the automated backups that happens on Azure SQL.
The official way, is to use bacpac https://msdn.microsoft.com/en-us/library/azure/jj156148.aspx
I find this cumbersome and so far, the best solution I have found for transporting data to and from Azure SQL is the “SQL Database Migration Wizard” https://sqlazuremw.codeplex.com/
This tool will export any database to script files that can be imported on Azure (and the other way). It has a lot of powerful features from selecting specific tables to stripping collation information on columns and much more.
Azure SQL has a very powerful backup/restore functionality, a backup is made every hour, and transaction logs are backed up every 5 minutes. Standard tier backup are saved for 14 days, Premium for 35 days.
You can read more here: https://msdn.microsoft.com/en-us/library/azure/jj650016.aspx
This is one of the corner stones for a cloud ERP, and is a really important step for NAV to become a 100% cloud solution. Next step would be to run the service tier as a worker role – One can only wish 🙂
