At some point, a couple of years back, getting a full blown Microsoft Dynamics NAV installation up and running was not a minor task. Multiple components should be installed, lots of setup to do. It could easily take an experienced person hours, if not days to get a complete installation up and running.
Thankfully, this has changed, and deploying Dynamics NAV in Microsoft Azure has never been easier than it is today.
Step 1
Go to http://aka.ms/navdemodeploy and login to the Azure Portal
Step 2
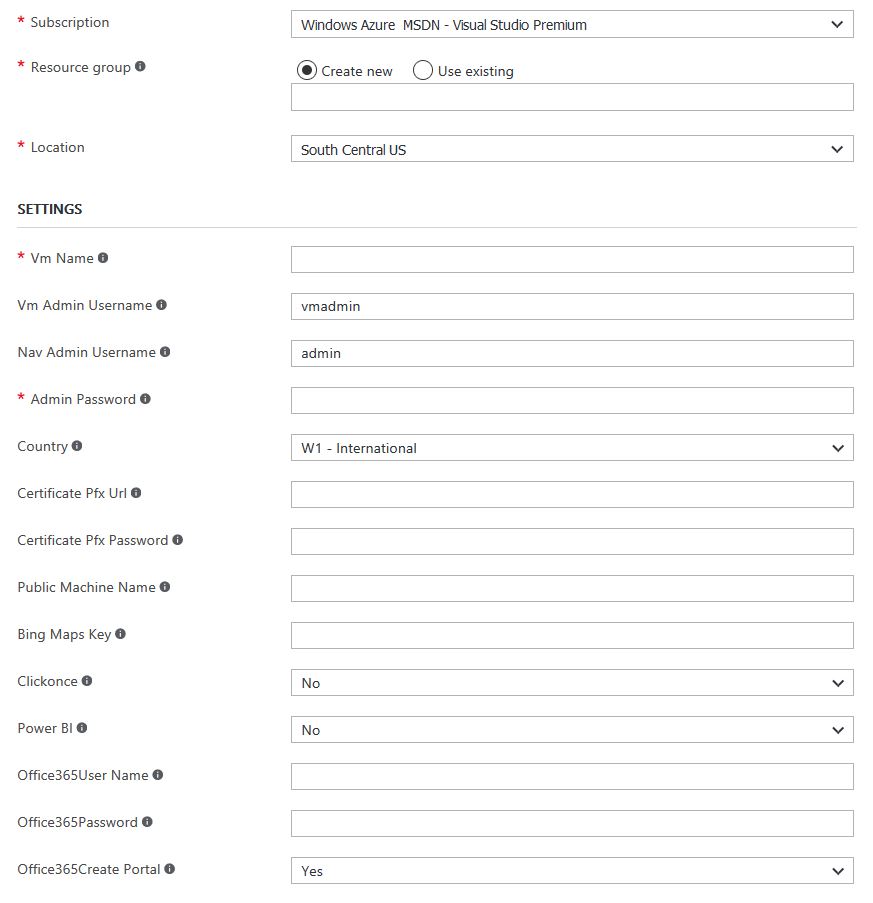
Fill out this form. Mouse over the small (i) markers to get help.
Some of the settings can be left blank if you don’t have a Bing Maps key. But please make sure that you select the correct country – W1 is the worldwide version of NAV, the version without any country specific functionality or language layers. If you want functionality specific to your country, you must select it.
Step 3
Ohhh, wait, you’re done, take a coffee break, let Azure deploy your server and then log into your new NAV instance when it’s ready!
Use this link to get a free Azure trial https://azure.microsoft.com/en-us/free/
