What do I need to do within Business Central to prepare SharePoint Connector to create pdf versions of Sales and Purchase documents?
There are three steps required to prepare SharePoint Connector.
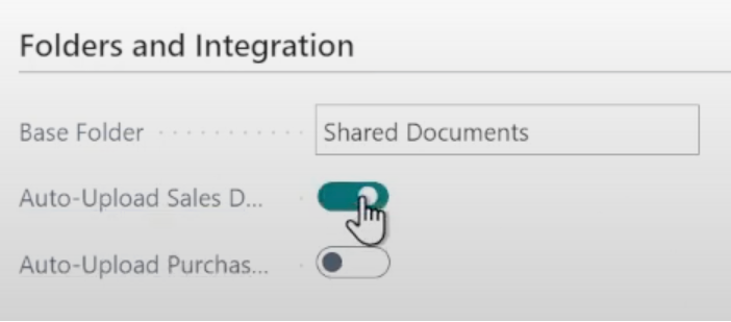
1. First, navigate to “SharePoint Setup” using the Business Central search bar. Toggle the buttons for “auto-upload sales documents” and “auto upload purchase documents” to on.
2. Navigate to “Sharepoint Table Mapping” using the search bar. Make sure that your tables for “customer”, “sales invoice header”, and “purchase invoice header” are all mapped. These should be mapped by default.
3. Navigate to “report selection sales” or “report selection purchase” using the search bar and select “invoice” with the Usage dropdown menu.
Now that I’m prepared to generate Sales and Purchase documents how do I do it using the SharePoint Connector?
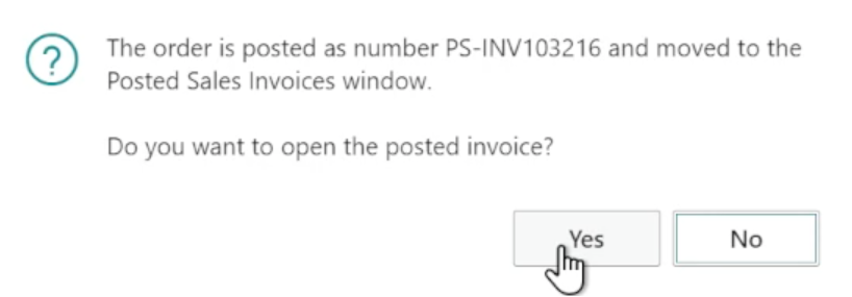
Once the three initial steps have been completed, you can navigate to a sales order and post the invoice. SharePoint Connector will generate a pdf of the invoice and ask if you want to open it. This invoice pdf will appear in your SharePoint box after a few seconds.