SharePoint Connector
Reports and Document Generation
How do I create a SharePoint Document template?
Start by navigating to “SharePoint Document Template” using the Business Central search bar. Now use the drop down menus to fill in the fields for table number and report number. Finally, specify the report file type (seen below). For example, “customer”, “order summary”, and “pdf”.
Now that I have my document template how do I use it?
Navigate to a customer within Business Central and select “generate document” from the dropdown menu in the SharePoint box on the righthand banner. Now select the template that you have created, for example “order summary”. A pdf of the report will be generated and placed within your SharePoint.
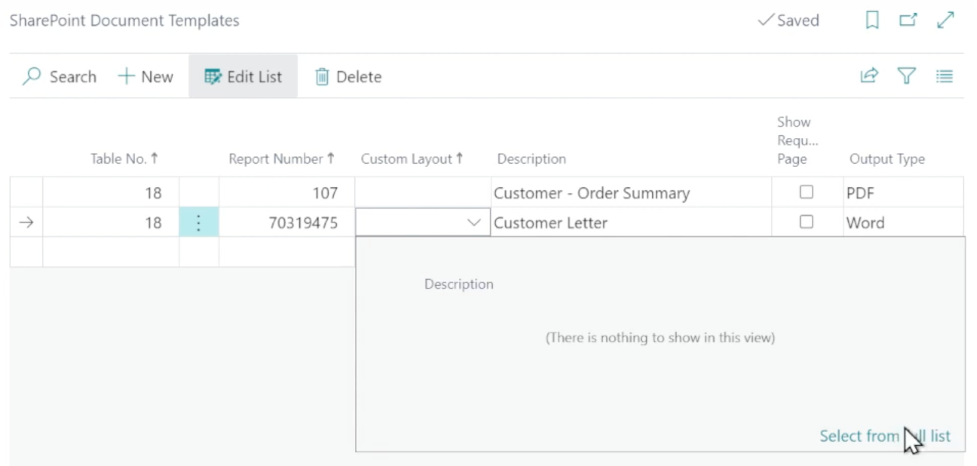
How can I create a new layout for a .word document being generated?
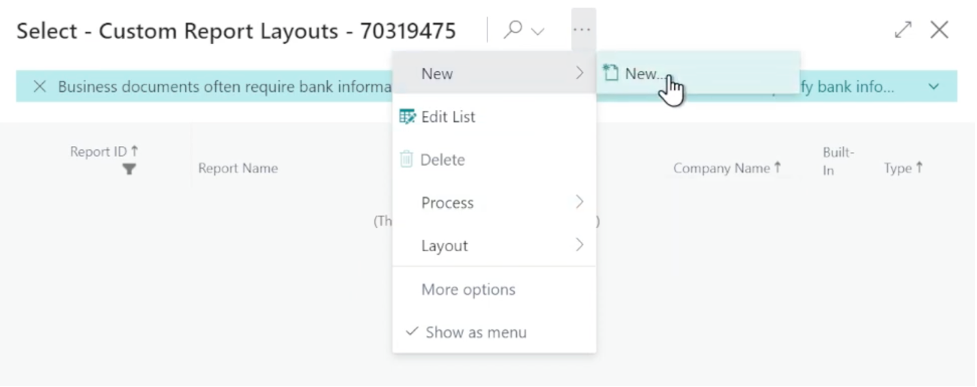
Navigate to “SharePoint Document Templates” using the Business Central search bar. Now create a new template but select .word as the file type. Use the dropdown for “custom layout” and then click “select from full list”. If no layouts are available, select the “…” header near the page header. From there, select “new” to create a new custom layout for the report generation and toggle on “insert word layout”.
Click the “…” header and navigate to Layout > Export Layout to download your layout. Open the layout using Word and you will see that it is quite empty. Navigate to the “Developer” heading within the word document and select XML Mapping Pane (seen below).
Select the fields from the right hand banner that you’d like to include in your document such as “name”, “city”, “date”, etc. Now save your template and return to Business Central. Navigate to … > Layout > Import Layout. Finally, select OK.